Cute DIY Decorations for Your Room: A Guide to Personalizing Your Space
Personalizing a living space is a fundamental aspect of making a house a home. Engaging in do-it-yourself (DIY) decoration projects offers a cost-effective and creative method to imbue a room with individual style and character. Creating cute decorations yourself can transform a mundane space into a reflection of personal interests and aesthetic preferences. This article explores several DIY decoration ideas, focusing on projects that are both visually appealing and manageable for individuals with varying levels of crafting experience.
String Art: Geometric Patterns and Personalized Imagery
String art is a versatile technique that involves creating designs by stretching string between nails hammered into a wooden board. This medium allows for a wide range of creative expressions, from simple geometric patterns to intricate depictions of animals or words. The materials required are relatively inexpensive: a wooden board, nails, a hammer, and various colors of string or embroidery floss. The process begins with sketching a desired design onto the wooden board. Nails are then hammered along the lines of the sketch, serving as anchor points for the string. The string is then wrapped around the nails in a strategic manner, creating the desired pattern or image. Variations in string color and nail placement can significantly alter the final appearance of the piece, providing ample opportunity for customization.
One popular application of string art involves creating geometric designs. These patterns, often based on triangles, squares, or other polygons, can add a modern and minimalist touch to a room. The interplay of straight lines and negative space creates a visually dynamic effect. For a more personalized approach, individuals can create string art representations of favorite animals, initials, or quotes. This requires a more detailed sketch and careful planning of nail placement to accurately capture the desired image. Consider using metallic or iridescent string to add a touch of glamour to the finished piece. String art offers a tactile and visually engaging way to create a unique wall decoration.
Furthermore, the base board for string art provides opportunities for further customization. Painting the board a solid color, staining it to reveal the wood grain, or even applying a textured finish can significantly enhance the overall aesthetic. Experimenting with different types of nails, such as decorative upholstery tacks, can also contribute to the unique character of the piece. The use of LED lights interwoven with the string can create a luminous and eye-catching display, particularly effective in dimly lit rooms. Properly securing the nails is crucial for the longevity of the piece; ensuring they are hammered in firmly and evenly will prevent the string from loosening or sagging over time.
Mason Jar Decor: Versatile Storage and Atmospheric Lighting
Mason jars, readily available and inexpensive, are incredibly versatile materials for DIY room decorations. Their simple, rustic aesthetic lends itself well to a variety of applications, from storage solutions to decorative lighting. Mason jars can be painted, decorated with decoupage, or simply left clear to showcase their contents. One common use is as storage containers for small items such as cotton balls, makeup brushes, or art supplies. Painting the jars with pastel colors or adding labels can further enhance their functionality and visual appeal.
Another popular application involves transforming mason jars into decorative lighting fixtures. By inserting battery-operated fairy lights into the jars, one can create a soft, ambient glow. These jars can then be placed on shelves, windowsills, or bedside tables to provide a warm and inviting atmosphere. Alternatively, mason jars can be used as lanterns by placing tea lights or small candles inside. For added safety, ensure that the jars are placed on a stable surface and away from flammable materials. Decorating the jars with lace, ribbon, or twine can further enhance their aesthetic, adding a touch of rustic charm to the room.
Beyond lighting and storage, mason jars can also be used to create miniature terrariums. By layering soil, small plants (such as succulents or air plants), and decorative pebbles inside the jar, one can create a self-contained ecosystem. These terrariums require minimal maintenance and can add a touch of greenery to any room. The addition of small figurines or decorative elements can further personalize the terrarium. Consider using a variety of jar sizes and shapes to create a visually interesting display. Sealing the top of the jar can help to retain moisture, but it is important to provide adequate ventilation to prevent mold growth. Regularly inspecting the terrarium and removing any dead leaves will help to maintain its health and appearance.
Photo Displays: Personalized Memories and Visual Storytelling
Displaying photographs is a classic way to personalize a room and create a visual narrative of cherished memories. Moving beyond traditional picture frames, DIY photo display projects offer creative and unique methods to showcase photographs. One popular approach involves creating a photo garland. This can be achieved by stringing photos together with clothespins or decorative clips along a length of twine or fairy lights. The garland can then be hung across a wall, window, or doorway, adding a whimsical and personalized touch to the space.
Another creative option involves creating a photo collage on a large canvas or piece of cardboard. Arrange the photos in a mosaic pattern or create a thematic collage based on a particular event or person. Adding decorative elements such as stickers, paint, or handwritten notes can further enhance the visual impact of the collage. Before adhering the photos permanently, experiment with different layouts to find the most visually appealing arrangement. Consider using a variety of photo sizes and orientations to create a dynamic and engaging display.
Furthermore, consider using unconventional materials to create photo displays. Repurposed window frames, wooden pallets, or even vintage ladders can be transformed into unique and eye-catching photo holders. Attach photos to the frame with clothespins, clips, or even glue. Adding decorative elements that complement the style of the frame can further enhance the overall aesthetic. The use of black and white photos can create a sophisticated and timeless look, while color photos can add vibrancy and energy to the space. Regularly updating the photos on display will keep the room feeling fresh and personal, reflecting evolving memories and experiences. Incorporating captions or brief descriptions beneath each photo can add context and enhance the storytelling aspect of the display.
DIY Wall Decals: Removable Art and Customized Patterns
Wall decals offer a flexible and affordable way to add personality to a room without the commitment of permanent paint or wallpaper. Creating DIY wall decals allows for complete customization of designs and patterns, reflecting individual aesthetic preferences. The materials required are relatively simple: adhesive vinyl, a cutting machine (such as a Cricut or Silhouette), and transfer tape. Alternatively, for simpler designs, stencils and paint can be used to create wall decals directly onto the wall surface. The process involves designing the desired image or pattern on a computer, then using the cutting machine to cut the design from the adhesive vinyl. The excess vinyl is then weeded away, leaving only the desired image. Transfer tape is applied to the front of the decal, allowing it to be easily transferred to the wall surface.
One popular application of DIY wall decals involves creating geometric patterns or abstract designs. These patterns can be used to create accent walls or add visual interest to plain surfaces. Experimenting with different colors and shapes can create a variety of effects, from minimalist and modern to bold and vibrant. For a more personalized approach, consider creating wall decals of inspiring quotes, favorite song lyrics, or custom illustrations. These personalized decals can add a touch of individuality and reflect personal interests.
Beyond geometric patterns and personalized quotes, wall decals can also be used to create temporary murals or scenes. Consider creating a cityscape silhouette, a forest scene, or even a whimsical underwater world. When applying wall decals, ensure that the surface is clean and dry. Use a smoothing tool to remove any air bubbles and ensure that the decal adheres properly to the surface. Wall decals are easy to remove and reposition, making them a versatile option for renters or individuals who enjoy changing their décor frequently. When removing a wall decal, peel it slowly and carefully to avoid damaging the wall surface. Heat from a hairdryer can help to soften the adhesive and make removal easier. Regularly cleaning the wall decals with a damp cloth will help to maintain their appearance and prevent dust buildup.
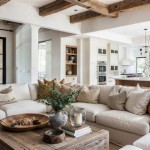
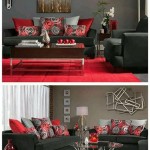
Personalized Throw Pillows: Comfort and Style
Throw pillows are an excellent way to add comfort, color, and personality to a room. Creating DIY throw pillows allows for complete customization of fabric choices, embellishments, and overall design. The basic materials required include fabric, stuffing (such as fiberfill or down feathers), a sewing machine (or needle and thread for hand-sewing), and scissors. The process involves cutting the fabric to the desired size and shape, sewing the pieces together (leaving an opening for stuffing), stuffing the pillow, and then closing the opening with a final seam.
One popular approach to DIY throw pillows involves using fabric with unique patterns or textures. Consider using fabrics such as velvet, linen, or cotton with bold prints or interesting weaves. Appliqué, embroidery, or fabric paint can be used to add further embellishments and personalize the design. For instance, adding felt shapes, embroidered initials, or hand-painted designs can create a one-of-a-kind throw pillow.
Beyond fabric choices, the shape and size of the throw pillow can also be customized. Experiment with different shapes, such as rectangular, square, round, or even novelty shapes like animals or flowers. Adding decorative elements such as tassels, pom-poms, or fringe can further enhance the visual appeal of the throw pillow. Consider using different filling materials to achieve different levels of firmness and support. Feather-filled pillows tend to be softer and more luxurious, while fiber-filled pillows are more affordable and hypoallergenic. Regular fluffing and cleaning of the throw pillows will help to maintain their shape and appearance. Spot cleaning any stains or spills promptly will prevent them from becoming permanent. Rotating the throw pillows periodically will help to distribute wear evenly and prolong their lifespan.

Amazing Diy Room Decor For 2025 Cute Aesthetic Ideas

Diy Room Decor Ideas Easy Fun 5 Minute S For Your Summer

Cute Diy Room Decor Ideas Under 100 Unique Popular Budget Decorations At Home

Diy Room Decor Organization Easy Inexpensive Ideas

Diy Room Decor Cute Affordable For Back To School

Easy Diy Room Decor Cute

50 Fun And Easy Diy Room Decor Ideas That Won T Break The Bank

75 Best Diy Room Decor Ideas For Teens Projects

31 Easy Diy Room Decor Ideas That Are Basically Magic Craftsonfire

Diy Room Decor And Ideas Make Your Super Cute Crafts For Star
Related Posts