DIY Room Decor Ideas Step By Step
Decorating a room can be a rewarding experience, transforming a plain space into a personalized haven. DIY projects offer a cost-effective and creative way to achieve this transformation. This article outlines several DIY room decor ideas, providing step-by-step instructions for easy replication.
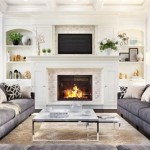
Accent Wall with Geometric Patterns
An accent wall can dramatically change a room’s aesthetic. Geometric patterns add a modern and dynamic feel. Materials needed include painter's tape, measuring tape, a level, and paint in chosen colors.
Step 1: Preparation. Clean the wall thoroughly and allow it to dry completely. Apply painter's tape to create the desired geometric pattern. A level ensures straight lines and precise angles. Popular patterns include chevrons, stripes, and herringbone.
Step 2: Painting. Carefully paint within the taped sections, ensuring even coverage. Multiple coats may be necessary for vibrant color. Allow each coat to dry completely before applying the next.
Step 3: Finishing. Once the final coat dries, carefully remove the painter's tape. Touch up any imperfections with a small brush. The newly designed accent wall becomes a focal point, adding personality to the room.
Floating Shelves
Floating shelves offer a stylish and space-saving storage solution. Materials required include wooden boards, shelf brackets, a drill, screws, a level, and a stud finder.
Step 1: Planning & Measuring. Determine the desired shelf placement and measure the boards accordingly. Use a stud finder to locate wall studs for secure mounting. Mark the stud locations on the wall.
Step 2: Installing Brackets. Position the shelf brackets on the wall, aligning them with the marked stud locations. Use a level to ensure the brackets are horizontally aligned. Drill pilot holes and secure the brackets to the wall with screws.
Step 3: Mounting Shelves. Place the wooden boards on top of the installed brackets. Secure the boards to the brackets using screws, ensuring a tight fit. The floating shelves provide a practical and visually appealing storage solution.
Upcycled Furniture
Transforming old furniture into unique pieces adds character and reduces waste. An old dresser or nightstand can become a statement piece with some creativity and effort. Materials will vary based on the project, but may include sandpaper, paint, new hardware, and fabric.
Step 1: Preparation. Clean the furniture piece thoroughly. Remove existing hardware and sand the surface to create a smooth base for painting or staining. Fill any holes or imperfections with wood filler.
Step 2: Painting/Staining. Apply the chosen paint or stain evenly, allowing each coat to dry completely before applying the next. For a distressed look, sand lightly between coats.
Step 3: Finishing Touches. Once the paint or stain is dry, install new hardware. Consider adding decorative elements such as stencils, decoupage, or fabric accents. The revitalized furniture piece adds a unique touch to the room.
DIY Wall Art
Creating personalized wall art adds a unique touch to any room. This project utilizes canvas, paint, brushes, and any desired decorative elements like stencils or fabric scraps.
Step 1: Canvas Preparation. Prime the canvas with gesso for better paint adhesion. Allow the gesso to dry completely.
Step 2: Painting. Apply the chosen paint colors, using brushes, sponges, or even fingers for different textures. Stencils can create intricate patterns, while fabric scraps can be incorporated for a collage effect.
Step 3: Finishing. Allow the paint to dry completely. Apply a sealant for protection and longevity. The custom-made wall art adds a distinct and personalized touch to the room’s decor.
Customized Lighting
Modifying existing lighting fixtures or creating new ones adds a unique ambiance. A simple lampshade can be transformed with fabric, paint, or other decorative materials. Materials will depend on the chosen design.
Step 1: Preparation. Clean the lampshade thoroughly. If using fabric, measure and cut the fabric to fit the lampshade, leaving extra for overlap.
Step 2: Decorating. Apply the chosen decorative elements. Fabric can be attached using fabric glue, while paint can be applied directly to the lampshade. Other materials like beads, ribbons, or tassels can be added for embellishment.
Step 3: Finishing. Allow the glue or paint to dry completely. Ensure all decorative elements are securely attached. The customized lampshade adds a personalized touch to the room's lighting.
Repurposed Storage Containers
Repurposing existing containers offers an economical and eco-friendly storage solution. Old jars, boxes, or tins can be transformed into stylish organizers. Materials might include paint, fabric, labels, and decorative elements.
Step 1: Preparation. Clean the containers thoroughly and remove any existing labels. Sand any rough edges for a smooth finish.
Step 2: Decoration. Paint the containers in desired colors or cover them with fabric. Add labels for easy identification of contents. Decorative elements such as ribbons, twine, or stencils can add a personalized touch.
Step 3: Organization. Arrange the decorated containers on shelves, desks, or in drawers to organize various items. The repurposed containers offer a practical and visually appealing storage solution.
Decorative Throw Pillows
Creating custom throw pillows adds comfort and style to any room. Materials needed include fabric, stuffing, a sewing machine (optional), and any desired embellishments.
Step 1: Fabric Preparation. Choose desired fabric and cut two pieces of equal size, allowing extra seam allowance. Consider incorporating different textures and patterns.
Step 2: Sewing. Pin the fabric pieces together with right sides facing. Sew along the edges, leaving a small opening for stuffing. Alternatively, fabric glue can be used for a no-sew option.
Step 3: Finishing. Turn the pillowcase right side out. Stuff firmly with filling material and close the opening by hand-stitching or using fabric glue. Add embellishments like buttons, tassels, or embroidery for personalization. The decorative throw pillows enhance the comfort and aesthetic of the room.

Diy Home Decor Step By Ideas 19 Erfly Wall Art

Living Room Wall Decor Ideas Diy Green Foliage Sign Step By Tutorial Art

36 Diy Home Decor Projects Easy Craft Ideas For Decorating

10 Diy Home Decorating Ideas On A Budget Futurian Thuis Hergebruik Knutselen Gerecycleerde Knutsels

20 Diy Room Decor Ideas For The Win Unique With S

Take A Look At These Diy Room Decor Ideas And Transform Your Home

5 Easy Diy Room Décor Ideas Decor

40 Gorgeous Diy Home Décor Ideas And Designs Renoguide N Renovation Inspiration

Take A Look At These Diy Room Decor Ideas And Transform Your Home

20 Diy Room Decor Ideas For The Win Unique With S